

Ali Abbas
-
Posts
213 -
Joined
-
Last visited
-
Days Won
14
Everything posted by Ali Abbas
-
Oh well. Cm hasnt answered me so I guess I am out. Good luck to you all
-
hi everyone. I thought posting the worklog with final pics was enough. but now i just checked there is a final submission form. I already had the worklogs up but thought that was enough. I entered the casemod and scratchbuild as well as a non pc mod. now i have submitted the final entries with social media links, 15o words etc.. but cannot upload pictures. please help. I get a link but it doesnt work. NON PC Mod name: RAMBO, LAST BLOOD TOWER Mod name: THE NEXT OF QIN Scratch Build name: BIG BAD BATTLE BOX
-
the devil is in the details and i am evil thx mate
-
and here are the finals. lets see if you can spot all 4 ram modules


-
Hi guys, here is a project that has computer parts, well just ram actually. but is more or less just to set them in scene. RAM stands for the Ram modules I integrated into this one. I used the Thermaltake Toughram Modules and integrated them into a Machine gun to show them off in such a way, that If yI wouldnt pouint them out, you wouldnt know they are there. I set it all off on a bunch of wooden planks bought dirt cheap from a buildinding society and made a double sided Rambo knife to set it off with a real Rambo knife too. After the fire at Caseking (my ex employer) I havent been able to repair it yet, so its a project ongoing. Dont even know If I can fix it. Its severly burnt. Aynway, here are some pictures. This was a low budget and quite qucik to make project. I udes the rambo knife hilt to make the hilts of the double handed Rambo Ram knife.


-
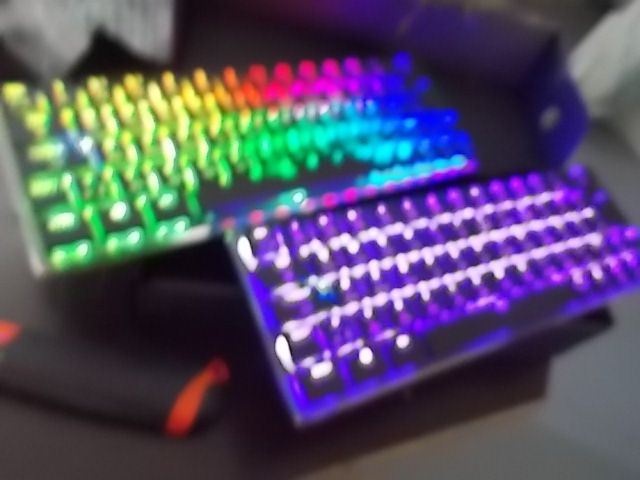
that was just about as far as i got, the had to pause. but any way, here are the finals. Special thanks to Coolermaster for the keyboards and mousepads.


-
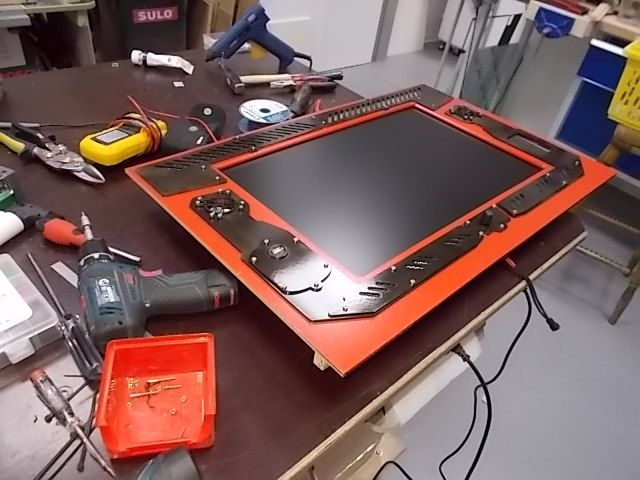
its built in such a way that i can lift up the keyboard control trays which are on hinges. ten i can get to all the bottom hardware andthe montore. the monitors are both older 19" fujitsu siemens second handers from ebay. seeing as its based upon linux, you have the best of both worlkds and can use the keyboards along with a mouse via the usb port on the left hand side of each opposite side to go online and also play the dos games too of course.


-
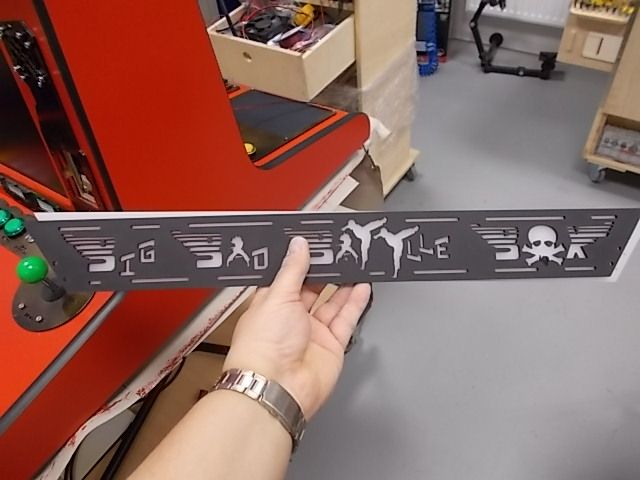
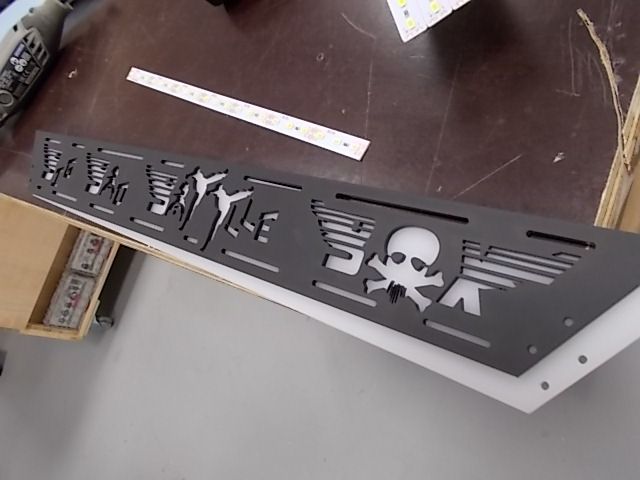
Hi guys, I actually started this project over a year ago, but after the fire at my workplace, or ex woekplace at Caseking, I have finally completed it and so here it is. What started out as a simple set of Coolermaster Gamer 621K keyboards, turned out to be a full fledge two sided play against eachother Arcade scratchbuild. Its has two sets of everything. two sets of game controls, two sets of speakers with volume control. twos sets of monitrs and two keyboards. tha hand rest is the mouse pad at the same time. Its based upon a raspberry pi and has two psus in it, a 5 volt and a 12 volt. it can play games from almost every game platform all the way from 1974 till 2002 and has at least 6000 games in 35 platforms on it. of course, while its a modern state of the art hardware emulator station, i still tryed my best to combine today with the look of the past while not sacrificing the fact that its is a new age design. anyway, here it is in pictures and videos. unfortunately i dont have all the pictures of the making of. so they are all just bundled together from my phone.


-
hi i dint finish this for this season but finished it for the 2022, so head along to that thread if you want ot see how it turned out
-
FINAL PICS, THE NEXT OF QIN! over 800 Hours of work, and rework after the fire at Caseking. I left caseking a few months ago. Am going solo again. Please feel free to visit my new website at www.thecre8or.de Thanks for watching and dont forget, after the build is before the build, so watch out for new mods. Thanks to Coolermaster for this platform and for the years of support in all my projects. Thanks to Thermaltake for the years of support in all my projects. Thanks to Nvidia for their years of support and many projects together. The best is yet to come.


-
here is the evolution of the halberts, that were scred underneath the parapetss. i cut them from acrylic because its harder, to chmfer and sand of really sharp but rugged edges. i used a broom stick halved for the handles and worbla strips to indicate or give to give the illusion of them being bound to the stave. even stuck worbla dragons on them before the paintjob. they really turned out great.a


.thumb.jpeg.d1ddc094798af527bd6bdae8cff68088.jpeg)
.thumb.jpeg.bfa16b018391b5c77759a85043ea2c15.jpeg)
.thumb.jpeg.705277dba26ca8d029b8d43784883eb2.jpeg)
.thumb.jpeg.f7fb5b41f8c18b3174b1c22ea209211d.jpeg)
.thumb.jpeg.cd5ad22f251d3dde45dce2506cd699cb.jpeg)
.thumb.jpeg.579cd7d4ad6c9e2e9242c03488b46417.jpeg)
.thumb.jpeg.27d047de08f79c6e3130521522a41b7c.jpeg)


-
now you can slowly see where the colour scheme is going, the gold is present but not dominating, the blacks are opresent bur not too dark, the reds are visually recognisable but dont pop out too muich and the browns and rust are omni present showing the age while not doing too much to hide it. the clear laquer really sets all the colours off afterwards. am also glad i sued sand in the initial coats, that roughens it all up and weathers it down for the old 2200 year old but restored look.


-
time for some color, well, after making the fromt window which is a sandwich. one layer of mdf designed with chinese dragons and then a n acrylic windows and then another mdf dragen layer. colors were rust and metal worn look with lots of deep reds and blacks and browns. intenstity was key. the terracotta army however should be alittle lighter and more on the coppery bronzy side to set them off in contrast against the red maroon black details. the armour plates were all painted along with the case with sand in the initial emulsion coat and them with wood stain aftzer painting to give them a worn out while still shiny look with clear lacker as the last layer. my god, watching these fotos and püosting them reminds me what an odyssey of details this was. whew, feel tired again


-
more work, this time on the cpu and ram block i also inlaid the NEXT OF QIN font on the topmost part of the roof with clear acyrlic and them poured elmers glue behind it. this was when i light it up from behind it will have an irregluar and old looking led effect. worked great after the paintjob.


-
details details detail. here you can see the armour plates, the rear windows for the two radiators and the QIN head, as well as the turrets thats will hold the water tubes am sorry for skipping many stages but i didnt make fotos along the way. thats a pity. am sometimes so intensely involved in the theme that i loose track of time space and reality,,,,,,,,,,and forget to document what i am doing.


-
a lot of allround structural work details details details, yeah baby. i love being at the themes mercy.


-
here are some pics showing how i made the parapet pedestals and the steps for leds holding as well as the basically the whoile structure for holkding the self made reservoirs that are the main roof pillars on NEXT OF QIN!.


-
one thing mentionable is the way i used extra mdf and sanding to curve the chniese roof corners up. worked better than i though.


-
i found these chines ancient coins on ebay and decided to make some strips for external leds and inlay them.


-
after making the roof i stuck on the 100 pieces of cardboard roof tiles i made. a neck breaker. took me two weeks of every evening


-
The very first thing I made, long before even starting the build itself was this QIN head for the rear. This was my first ever effort in using clay. since I dont have an oven that can bake it with 900 degrees, i resorted to using it as a cast for yet another mold i made and casted it again with palter of paris/gypsum. here is a video too showing how it eveolved. it might look easy, and even though i am happy how it turned out , it wasnt.

-
i made a silicon mold and after halving the 4 soldiers i bought, i used the halves to remake the 52 warriors that would protect this build from all sides, from plaster of paris/gypsum. they were very delicate and many lost their limbs which i had to mold again. the paintjob was key with copper bronze and a dirt down with black and silver.


.jpeg.6e863e8839e5658c9517b71eb336cde7.jpeg)
.jpeg.66b6667f71346a2153d2fa87baf6a437.jpeg)
.jpeg.5dc64d281ce990d45eea994665bb7f84.jpeg)
.jpeg.8b1cab40fbaec851ed441246c01e8d90.jpeg)
.jpeg.4ded7a99052c04700e08256a42b273f9.jpeg)
.jpeg.7fbe90ede8cc19626fb5b453d7e1d732.jpeg)
.jpeg.8d36369bd442645164fcf82b2a2928dd.jpeg)


